Saturday, March 30, 2013

Refurbished - Singer 99-31


••• SOLD •••
Vintage Singer 99-31 Sewing Machine
Very Clean - Serviced
Circa 1955
Made In USA

$599.00
Singer 99-31 Sewing Machine

Here is a little Singer 99-31 that I refurbished in 2012.  It was fairly dirty and ran slow.  It was missing the manual, grease, oil, and needles (replaced them with vintage originals found here and there).  It did come with the box of accessories.  The wiring was cut in a few places so I rewired from the motor to the wall plug.  The case had some stains that I never could remove.

I oiled and greased the machine with Tri-Flo and polished and waxed the painted surfaces.  It now runs like a top... even the bobbin winder works flawlessly.  It turned out to be a little beauty.

I learned a lot from the little machine, so decided to purchase a Singer 221 Featherweight.

I've since sold the 99-31.

I hope you enjoy the photos.

Michael


SOLD January 2013

Singer 99-31 Sewing Machine

Singer 99-31 Sewing Machine

Singer 99-31 Sewing Machine

Singer 99-31 Sewing Machine

Singer 99-31 Sewing Machine

Singer 99-31 Sewing Machine

Singer 99-31 Sewing Machine

Singer 99-31 Sewing Machine

Singer 99-31 Sewing Machine

Singer 99-31 Sewing Machine

Singer 99-31 Sewing Machine

Singer 99-31 Sewing Machine


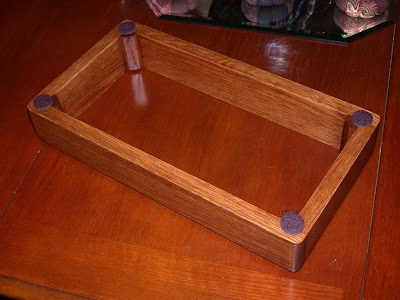
Custom - Base for Singer 15-91, 201

Custom - Base for Singer 15-91 - Display Stand

If you own a Singer 15-91, it probably didn't come with a case or a cabinet.  It is almost impossible to use without one.  I decided to make a decorative and functional base for my Singer 15-91.

Once I figured out the dimensions, it was just as easy to make two... so I did.

Kept one for me and sold one on ebay.


Custom - Base for Singer 15-91 - Display Stand

Custom - Base for Singer 15-91 - Display Stand

Custom - Base for Singer 15-91 - Display Stand

Hope you enjoyed this idea.

Michael

ps... If you are interested in one of these for yourself, let me know and I'll get back to you with pricing.


DIY - Sewing Machine Needle Organizer Wallet

DIY - Sewing Machine Needle Pouch Organizer


I've been driving myself nuts trying to keep track of my sewing machine needles.  I keep forgetting what I have installed in each of the growing number of machines that I use.  I don't want to put used needles back in the "new" container, so I lay them down somewhere with full confidence that I'll easily remember what size it is.  It takes about 3 minutes to forget, not only the size, but ever having seen it before.

I needed a system.... so yet another internet search began.

I found this idea somewhere, sorry to the originator whose name and post location I've forgotten, and decided to embellish it for my own use

Basically, you take an 11" x 11" square of an inner and outer fabric, sew the grid with a contrasting thread (I used a quilted fabric to help me keep the lines parallel), label the gridded fabric with a permanent marker then turn it good side to good side with the outer fabric and sew it together with a 1/2" seam allowance.  Leave a section open for turning it right side out.

Clip the corners and turn right side out, then top stitch around the perimeter.

I then cut a couple circles of velcro and hot melted them in place... VOILA... organization!

I took the photos with the organizer on a cutting mat so that you can get an idea of the grid spacing.

Assign various colored pins to your machines and pin them into the organizer indicating which needle is in which machine.

I'll probably forget which color I assigned to which machine...

She had another idea where she took an old pincushion and wrote the needle sizes about the cushion and just stuck that size needle there.  Free, if you've got an old pincushion.

Hope you enjoyed this idea.

Michael
My Items For Sale On Ebay


DIY - Sewing Machine Needle Pouch Organizer

DIY - Sewing Machine Needle Pouch Organizer


DIY - Cone Thread Stand

•••••••••••••••••••••••••••••
Thread Spool Stand Alternative:

I'm working on a prototype now for eliminating the need for a spool stand when using cone spools.
As soon as I get a production unit available, I'll post it.
If you use the larger spools and one of those ugly, cumbersome, inconvenient, nasty thread stands, you are going to love this!!!

Now back to your regularly scheduled blog...
•••••••••••••••••••••••••••••

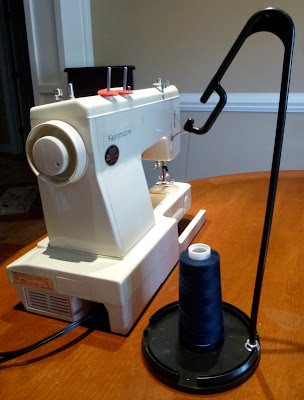
DIY - Cone Thread Stand:
I use a lot of MagicLock thread which comes on 3.000 yard cone shaped spools.  It is necessary to place these on a spool stand so that the thread unwinds from the top.  I've seen these go from $10 to $50 depending on their complexity.  I'm cheap.  I saw one made from a CD/DVD storage spindle so decided to see what I had lying around to give it a try.  I decided upon the CD/DVD spindle, a hanger, and a 5/16" nut.

Here's my take on it:

Thread Spool Stand - DIY - Cone
Finished Product

Here's the procedure:

Thread Spool Stand - DIY - Cone
Parts List:
Hanger with strap hooks
CD/DVD storage case spindle
5/16" nut
Tools:
Hacksaw
End Cutters
File
Sandpaper
Optional: 5/16" Die

Thread Spool Stand - DIY - Cone
Cut the spindle with a hacksaw so that it is shorter than the spool of thread.
Super glue the nut at some convenient location along the perimeter of the base.

Thread Spool Stand - DIY - Cone
File the top of the spindle so that it looks neat.
You don't want your spindle looking like crap.

Thread Spool Stand - DIY - Cone
Clip or saw the hanger at one end.
Thread Spool Stand - DIY - Cone
Clip or saw the hanger at the other end.
Thread Spool Stand - DIY - Cone
File the end of the strap hook.
I used a small round file to cut a rounded groove for the thread to pass across.

Thread Spool Stand - DIY - Cone
Sand the opposite end so that it fits into the nut.  You can glue it in.
I threaded mine with a 5/16" die so that I could screw it into the nut,
but then, I'm not right.

Thread Spool Stand - DIY - Cone
After inserting the hanger into the nut, use a heat gun or hair
dryer to heat the hanger just above the nut.
Do this until you can bend the hanger so that the hook is
directly above the center of the spindle.
Hold until cool enough for the hanger to maintain its position.

Thread Spool Stand - DIY - Cone
Place spool on your new handy-dandy thread stand and
run the thread through the hook and then over to the machine
and thread as normal.  SEW!


Links - Sewing & Vintage Sewing Machine

Helpful Links - I'll add to these periodically
(Last Updated 6-16-2020)


Lubrication - Grease & Oil:
The best grease and oil for sewing machines that I've found is Tri-Flow
Oil - Get the 2 oz. (TF21010) or 6 oz. (TF0021060) bottle (comes with applicator straw)
Grease - TF23004 - 3 oz.
Note: Tri-Flow grease is not recommended for Singer potted motor wicks (15-91, 201, etc.).  It does not flow correctly through the wicking material.  For potted motor wicks, use Singer grease.  I've read that some are using pure vaseline (no additives or perfumes).


AeroKroil - Loosens Metal Parts Fast
They usually have a two-can special which beats any deal I've found elsewhere!
Best product for loosening frozen parts... that and a little heat.

Sewing Tutorials:
April Baylor - Sewing Novice Blog
The Crafty Gemini


Support - Vintage Sewing Machine Repair Tutorials:
Basic Sewing Machine Repair - By K. Kiri and S. Kalmakoff
mysewingmachineobsession.blogspot.com - By Elizabeth
The Vintage Singer Sewing Machine Blog - By Nicholas Rain Noe
DragonPoodleStudio - By Cheryl

Support - Groups:


Thread:

For general sewing, my new favorite thread is Gutermann Mara 100 thread (TEX30).
Available in spools of 1,097 yards for $1.99 when it goes on sale.
100% premium polyester and greatly reduces fraying.
You'll need to buy or make a spool stand.
wawak.com

This is a great general sewing thread, a little thinner than Gutermann Mara 100, but feeds perfectly in all of my machines.  My go-to thread for serging.
MaxiLock (TEX27) thread in 3.000 yd spools for under $2.00 each.
100% polyester.
You'll need to buy or make a spool stand.

Thread Spool Stand Alternative:
I'm working on a prototype now for eliminating the need for a spool stand when using cone spools.
As soon as I get a production unit available, I'll post it.
If you use the larger spools and one of those ugly, cumbersome, inconvenient, nasty thread stands, you are going to love this!!!

Tools:
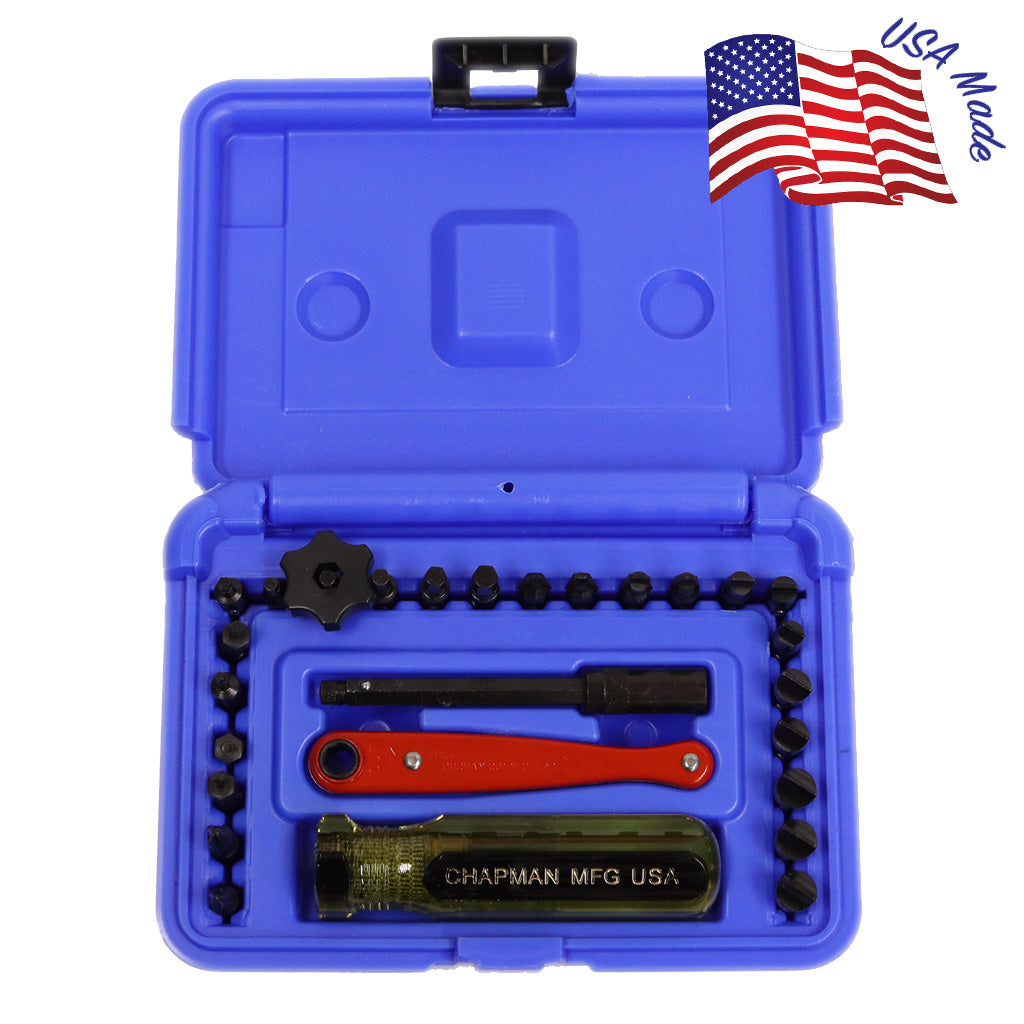
Hollow Ground Screwdrivers:
Don't screw up your screws!
Get the #8900 Screwdriver Kit

Singer Light Snap Ring Pliers:
Reinstalling the little metal snap rings is very difficult.
These pliers make it a "snap"!
Wilde #G409P Right Angle Snap Ring Plier

Vintage Sewing Machine Parts & Supplies:
Central Michigan Sewing Supplies -- Nice site covering many vintage machine manufacturers.
mcmaster.com Featherweight Fiber Washer
searspartsdirect.com For Kenmore Parts
sewingstyle.com
sewingmachineparts.net Guy Baker
vintagesingerparts.com Large source of vintage Singer parts and accessories.
whitesewingcenter.com Ray White's Sewing Machine Repair Classes


Refurbished - Singer 221 Featherweight

Downloadable Manual

••• SOLD •••
Vintage Singer 221 Sewing Machine
Very Clean - Serviced
Circa 1952
Made In USA

$649.00
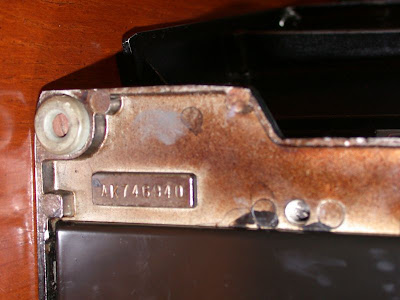
Singer 221 Featherweight Sewing Machine

Here is a little Singer 221 Featherweight that I refurbished in 2012.  It had been owned by an elderly woman and sold by a family friend who knew nothing of sewing machines.  He told me that it had the bobbin case, but what he meant was that it had bobbins.  Always be sure that this particular model has the bobbin case.  An original vintage bobbin case will run about $50 if you can find one.  Lesson learned.  It had the accessories foot pedal, case with keys, and the manual.  I was able to find and add the grease and unopened vintage needles.

The unit was dirty and needed grease and lube.  The cords and belt were good, but the bobbin tire and spool felts needed replacing.  It shined up beautifully and ran like a dream.

The thing that is peculiar about the Featherweights is that the case and machine reek of a 1,000 moldy basements.  It is hard to describe just how foul these things can smell.  We had to keep it in the garage until determining how to deodorize it.  It all has something to do with the glues used to assemble the case, the vintage oils that collect on the drip pan felt becoming rancid, and where the thing was stored over the past 50-60 years.  Mine stunk to high heaven.

There is a plethora of home remedies for eradicating the odor on the internet.  We first tried ZORBX which did nothing; don't waste your money.  We then placed a plate full of ground coffee beans in the closed case for a week... then it smelled like musty coffee.  I sprayed it with Lysol which helped a little, but the smell came back.  Finally, I placed the closed case in my closed truck in the heat of a North Carolina summer for about a week.  Odor definitely better.  With the case now opened, it spent another hot week in the back seat of the truck.  I finished off the treatment by misting lavender oil on all of the interior surfaces of the case... several applications.  The case finally smelled like my grandma's potpourri laced dresser drawers.

The machine also stunk... even after cleaning, polishing, and waxing.  These were one of the first machines with an oil drip tray built into the case.  There is a felt pad which lies on the tray to absorb any oil.  I suppose this was intended to keep young ladies attire from becoming sullied as they carried the machine from place to place.  Unfortunately, it also created a repository for the oil to accumulate and soar to never before recorded levels of rank rancidity.  I found replacement pads at www.sew-classic.com .  Jenny, who owns the site, has many, many replacement parts for vintage Singers and many other makes of old machines.  After cleaning the tray and replacing the pad, I left the machine in the lavender sprayed, closed case for another month; applying repeat treatments of the lavender oil every couple of days.  This hid but did not eliminate the stink.  I then loaded it with ground coffee and let it sit in the hot garage... no joy.  I tried all of the potions at the box store... no luck.  I even sprayed on some hydrogen peroxide with little result.  The last thing that I tried was to leave it in the back of my closed truck for a month in the mid-summer heat.  THIS WORKED...!!! Finally the stench was gone and we could bring the machine into what has become the sewing machine display and rescue room... i.e., the dining room.  

So now the machine, case, and accessories comprise what might have been a typical original purchase package.  I like things being complete, clean, and in working order.

I intended all along to sell this machine once I got it working and looking good, but the more I looked at it, the more I fell in love with the design, the light weight, and the quality of the mechanical engineering and machining that went into its manufacture... plus it was just darned cute.

Finally, I wanted to get this machine into someone's hands who might use it... and so it was sold.  I think I miss the oil can as much as the machine.

I learned a lot from the 221 and used the money to purchase a Necchi BU Nova.

I hope you enjoy the photos.

Michael


SOLD December 2012

Singer 221 Featherweight Sewing Machine

Singer 221 Featherweight Sewing Machine

Singer 221 Featherweight Sewing Machine

Singer 221 Featherweight Sewing Machine

Singer 221 Featherweight Sewing Machine

Singer 221 Featherweight Sewing Machine

Singer 221 Featherweight Sewing Machine

Singer 221 Featherweight Sewing Machine

Singer 221 Featherweight Sewing Machine

Singer 221 Featherweight Sewing Machine

Singer 221 Featherweight Sewing Machine

Singer 221 Featherweight Sewing Machine

Singer 221 Featherweight Sewing Machine Case

Singer 221 Featherweight Sewing Machine Case

Singer 221 Featherweight Sewing Machine Case

Singer 221 Featherweight Sewing Machine Attachments

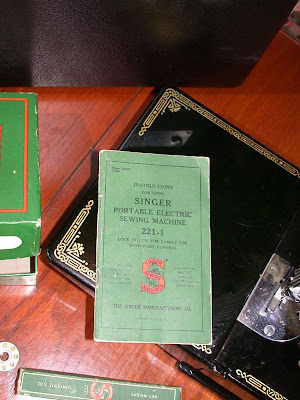
Singer 221 Featherweight Sewing Machine Manual

Singer 221 Featherweight Sewing Machine Oil Can

Singer 221 Featherweight Sewing Machine