I found this article some years ago and have now tested it on several Bernina machines with great success. Bernina's are very prone to yellowing on the back side and ends.
I'm attaching it to help others grappling with this issue.
The article is technical, but pursue reading, because the author goes onto describe it all in layman's terms using commonly available materials from the grocery store and the beauty supply store.
Hope this helps.
Good Luck,
Michael
De-Yellowing_Plastic.pdf

Tuesday, June 2, 2020
Monday, December 17, 2018
Jeep Dog Cushion
First attempt at creating an upholstered cushion...

*********************************************************************
Mountain rides are a passion for us and taking Cooper, our dog, is a
must. Unfortunately, in the CJ, there is no safe place for him.
Decided to make and upholster a cushion. Watched a couple of great
videos by Cechaflo on YouTube and got started.

Found some high density foam at the local auto upholstery supply. They
actually had a foam graveyard with all types of foam... for cheap. This
piece cost $10. It is 6" thick and just fits my bandsaw which cut the
sides and the curves very well. Used an electric carving knife for the
bevel.
To get the perfect size, I spray glued several pieces together. Then
marked reference points at midpoints on the sides and midpoints on the
curves. This will allow registration marks on the pattern to help keep
panels from shifting while sewing.

Used rosin paper from the hardware store to cut patterns of the sides,
pinned to foam to check fit and fine tune the curved sections. Be sure
to transfer all of the registration points to the paper.

It is important to pin all of the patterns on the foam together to make sure all of the seam lines meet.

Used weights to keep the pattern from shifting on the fabric, marked the
reference points, then added 5/8" seam allowance. Here you can see the
zipper placket sewn to the head piece to form the band.

Used spring clips to hold the material together being careful to align
guide marks. Using a walking foot commercial sewing machine is helpful
in keeping the material from shifting. The cylinder arm also aids in
sewing the curved and square corners.

Traced the actual pattern on the fabric, then added the 5/8" seam
allowance. It is then possible to sew right on the intended seam line
rather than trying to follow the edge of the seam allowance.

The square corners were more challenging. Sewing one side of each
corner at a time allows more control rather than trying to continue
around the corner in one sewing pass.

Decided to sew in one long zipper on three sides to make the cover
easier to get on the foam. Also checking fit prior to sewing on the
bottom panel.

The clips are so much easier than pins.

For a first attempt, I'm happy with the fit.
Here is the cushion installed in the Jeep. Overall size of the cushion
is 6" x 12" x 28". The back of the cushion rests against the step of
the bed, snug fit between seats, and allows the seat belts to be
fastened easily. Next will be the harness.

Cooper approves this post.
Hope this helps you get your pal comfortably situated for those beautiful mountain rides together.
Mike
Sunday, August 12, 2018
Jeep CJ7 Cab Cover
Needed a cover to keep the rain and dew out of the interior while camping in the North Carolina woods. Having a bolt of Sunbrella that I bartered some antique "church keys" for, I decided to try to make one...


Sunday, July 17, 2016
Sack Dress
I bought a sack dress for Mary 25 years ago and she still has it, but it is showing signs of age... so, I decided to make a pattern from it and build her a new one.
It was much harder than imagined, but finally, here she is modeling it with Cooper, the english bull terrier.


It was much harder than imagined, but finally, here she is modeling it with Cooper, the english bull terrier.


Sunday, March 6, 2016
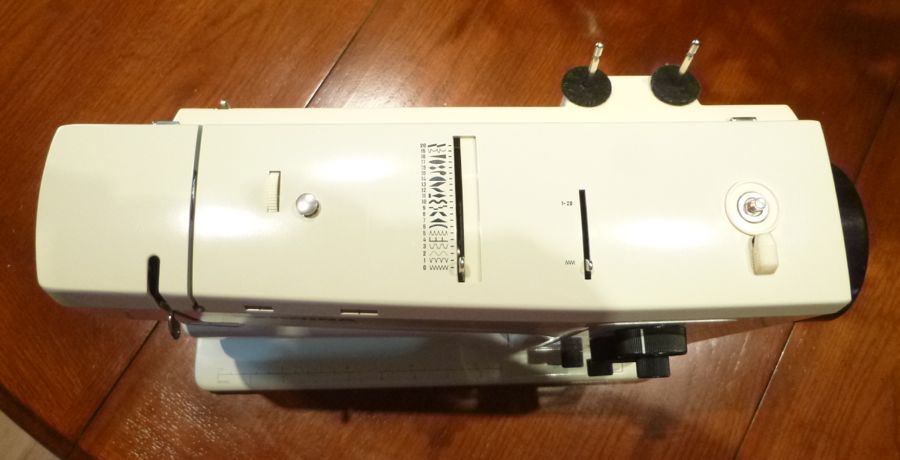
Vintage Bernina 830 Record Sewing Machine - Restored
••• SOLD •••
Vintage Bernina 830 Record Sewing Machine
Very Clean - Serviced
Circa 1970's
Made In Switzerland
$849.00

Treat yourself to one of the most sought after vintage, all metal, sewing machines ever made... or surprise a loved one with a truly special gift.
This machine is in especially nice condition with very little yellowing. This model is notorious for yellowing on the side and back panel and the motor shroud. This was caused by being left in the window for years on end. A good indicator that this machine was kept in the case when not being used. The case even has the original inspection sticker on the side and the styrofoam shipping inserts (quite rare).
The case handle and latches are near perfect. The case is near mint.
This machine has been thoroughly cleaned, serviced, oiled, lubed, polished and waxed. The case has been treated with a UV inhibiting plastic preservant.
Look at the pictures of the inside of the machine as well as the outside of the machine and it is clear that the previous owner babied it. I purchased this machine from the original owner. It is in very good condition and comes with a full complement of accessories to include:
---- Sewing Machine Case w/Styrofoam Inserts (Very Rare)
---- Knee Bar
---- Extension Table
---- Foot Controller
---- Foot Controller Cord
---- Foot Controller/Cord Caddy
---- Original Manual (some markings inside)
---- Accessory Case & Accessories (listed below)
Presser Feet:
---- 000 - Zigzag Multi-Purpose Foot (On Machine)
---- 007 - Zipper Foot
---- 016 - Blind Stitch Foot
---- 028 - 7 Groove Pintuck Foot
---- 030 - Embroidery Foot
---- 168 - 2MM Roll & Shell Hemmer Foot
---- 174 - Lap Hemmer Foot
---- 419 - Tailor Tacking Foot
---- 452 - Buttonhole Foot
---- 470 - Overlock Foot
---- Edge Guide
Additonal Accessories:
---- Original Bernina Bobbin Case
---- Original Bernina Oil Tube
---- Original Bernina Embroidery Hoop
---- Bernina Screwdriver
---- Bernina Needle Screwdriver
---- Lint Brush
---- Metal Bobbin (5)
---- Wing Bolt & Nut for attaching machine to table
---- New Schmetz needles - 5 pack (1 in machine)
----New Spool Felt (black)
General:
The machine is in extremely good condition. There is a tiny chip in the paint by the ruler decal. The ruler decal on the base of the machine is not perfect and there is a small dimple in the handwheel release knob. (please see photographs). Not bad for a 40+ year old machine. I've not come across an 830 in such good shape.
Service:
I performed a visual inspection of the machine and found the electrical to be in good condition and did not replace it. The cord is pliable and has been meticulously cleaned and UV protected.
Light switch and lightbulb are in working order.
All moving joints, including motor, has been oiled with Tri-Flow. All gears have been greased with Tri-Flow grease. The unit runs smooth and quiet from low to high speed. When the low-speed switch is engaged, the machine hums normally due to the diode technology Bernina used at the time of manufacture. This is normal.
Old capacitors have been removed. These are now considered obsolete and can become problematic and costly to remove. They were originally installed to reduce radio interference which may not be necessary in today's electronics. According to one source, some interference may still occur. If it does, 0.1 microfarad, class X2 can be used. The RFI capacitor across a universal motor or carbon-pile speed control also reduces sparking and slightly increases the working life of the carbon parts.
All presser feet have been cleaned and have been treated with dry lubricant.
The bobbin winder works and the auto-stop performs properly. The unit sews properly, forward and reverse. Handwheel releases the needle bar properly for bobbin winding.
The thread tensioner works properly.
The belt and timing have been inspected are perfect. The hook has been polished. See the photo of the test stitching… perfect.
I am not a sewing machine technician. I am a general contractor who has worked on tools for decades and, for some reason, like to play with vintage sewing machines.
- Ready to ship (I pack very well)
- I highly recommend not letting this one get away!


Wednesday, February 17, 2016
DIY - Do-Rag
Tore apart an old Do-Rag and made a pattern from it.


Hope you enjoyed this idea.
Michael
Subscribe to:
Posts (Atom)